
Positioning with CSS
There are several ways to position elements using CSS.
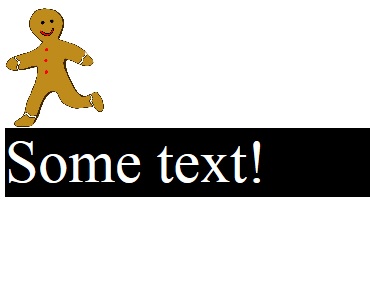
The default positioning setting is called "static". As an example, imagine a page has an image and some text in the body section:
<img src="ginger.png" id="imgStyle"/>
<div id="txtStyle">
and has the following in an associated css page:
#imgStyle{
width:100px;
}
#txtStyle{
font-size:60px;
background:black;
color:white;
}
The page would look something like this:
There are 3 alternative positioning options.
1. Absolute Positioning
Absolute positioning lets you determine an element's location by specifying left, right, top or bottom position in pixels, ems or percentage. Absolutely positioned elements are completely detached from the ordering of elements on the page so they may "float" above other elements or "hide" behind elements. Here's what happens when the code is changed to make use of absolute positioning:
#imgStyle{
position:absolute;
top:23px;
left:95px;
width:100px;
}
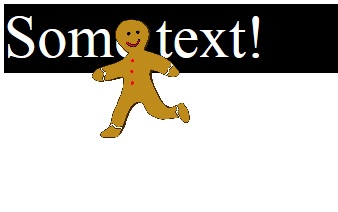
You can set the stack order of elements that overlap using the z-index property. For example, if we wanted the gingerbread man on our page to appear above another image, we could use the z-index like this:
#imgStyle{
position:absolute;
top:125px;
left:95px;
width:100px;
z-index:2;
}
#img2Style{
position:absolute;
width:300px;
z-index:1;
}
#imgStyle{
position:absolute;
top:125px;
left:95px;
width:100px;
z-index:2;
}
#img2Style{
position:absolute;
width:300px;
z-index:1;
}
Conversely, if we wanted the gingerbread man to appear below the image, we could switch the z-index assignments like this:
#imgStyle{
position:absolute;
top:125px;
left:95px;
width:100px;
z-index:1;
}
#img2Style{
position:absolute;
width:300px;
z-index:2;
}
#imgStyle{
position:absolute;
top:125px;
left:95px;
width:100px;
z-index:1;
}
#img2Style{
position:absolute;
width:300px;
z-index:2;
}
2. Relative Positioning
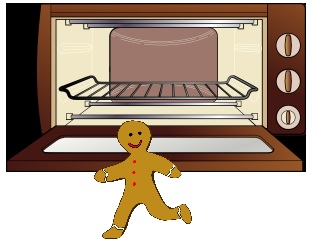
A relatively positioned element is placed relative to its current position in the HTML flow. So, for example, setting a top value of 300 pixels and left value of 400 pixels on a relatively positioned headline moves that headline 300 pixels down and 400 pixels to the right from wherever it would normally appear.
Other elements on the page will accommodate this change by leaving a "hole" where the element would have been placed and/or moving down the page further. For example, changing the code in the gingerbread image example like this:
<html>
<head>
<title>Positioning Example</title>
<style>
#imgStyle{
position:relative;
top:50px;
left:95px;
width:100px;
}
#img2Style{
width:300px;
}
</style>
</head>
<body>
<img src="ginger.png" id="imgStyle"/>
<img src="oven.bmp" id="img2Style"/>
</body>
</html>
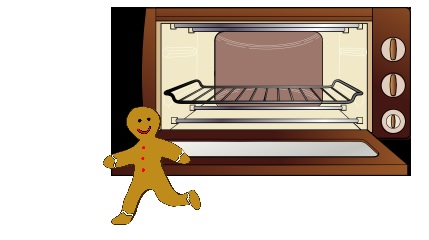
The relatively positioned gingerbread image is moved 50 pixels down and 95 pixels to the right but because it normally would have been placed directly to the left of the oven, that space has been left blank.
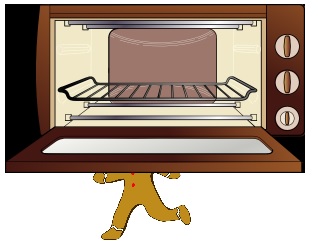
3. Fixed Positioning
Fixed elements are locked into place on the screen. Try out this code and see what happens! (You'll have to find your own images to link).
<html>
<head>
<title>Positioning Example</title>
<style>
#imgStyle{
position:fixed;
top:300px;
left:95px;
width:100px;
}
#img2Style{
width:300px;
}
</style>
</head>
<body>
<br/><br/><br/><br/><br/><br/><br/><br/>
<br/><br/><br/><br/><br/><br/><br/><br/>
<br/><br/><br/><br/><br/><br/><br/><br/>
<br/><br/><br/><br/><br/><br/><br/><br/>
<img src="ginger.png" id="imgStyle"/>
<br/><br/><br/><br/><br/><br/><br/><br/>
<br/><br/><br/><br/><br/><br/><br/><br/>
<br/><br/><br/><br/><br/><br/><br/><br/>
<br/><br/><br/><br/><br/><br/><br/><br/>
<img src="oven.bmp" id="img2Style"/>
<br/><br/><br/><br/><br/><br/><br/><br/>
<br/><br/><br/><br/><br/><br/><br/><br/>
<br/><br/><br/><br/><br/><br/><br/><br/>
<br/><br/><br/><br/><br/><br/><br/><br/>
</body>
</html>
